some thoughts after jukai
Jukai is the Japanese word for the zen ceremony of “taking the precepts”. Basically you vow to take sixteen precepts seriously in your life after some time meditating with each of them. And on the surface they're kind of weird and dumb. Do not kill. Do not lie. Do good. Why would anyone care to devote so much time and energy to these basic and obviously good things and what does that have to do with zen?
Central to my commitment and enjoyment of zen is the notion that there's nowhere to run, nowhere to actually escape the demands, responsibilities, and bullshit of life. Meditation is meant to bring you here--in all its complexity and regardless of circumstances. Bowing and chanting too. Part of jukai is sewing a complicated bib, called a rakusu, by hand. There’s you and you’re sewing a rakusu. For hours. You don’t pay anyone else to do it, no prayers will whisk away your frustration at your lack of skill, and sewing it drunk will not make it more fun.
So taking up these confusing and vague statements during meditation is a great way to watch yourself squirm under moral imperatives. Should we do good? Of course! How do we do good? That’s a much messier, much uglier answer.
Zen is also constantly pointing to the deep intimacy of our relationship to everything. Taking the precept of not stealing reminds us that we're on stolen land. Taking the precept of not misusing sex reminds us of all the terrible violence against women only now coming to the mainstream. Taking the precept of not killing reminds us that the apparent agency and safety of some relies on the exploitation and murder of brown and black bodies. Whether we like it or not we're deeply implicated in all of this.
So taking these vows and being part of a community that is dedicated to both exploring and holding others accountable to these precepts is a great privilege. Let's get to work.
adding switches to the fostex x-12 erase head
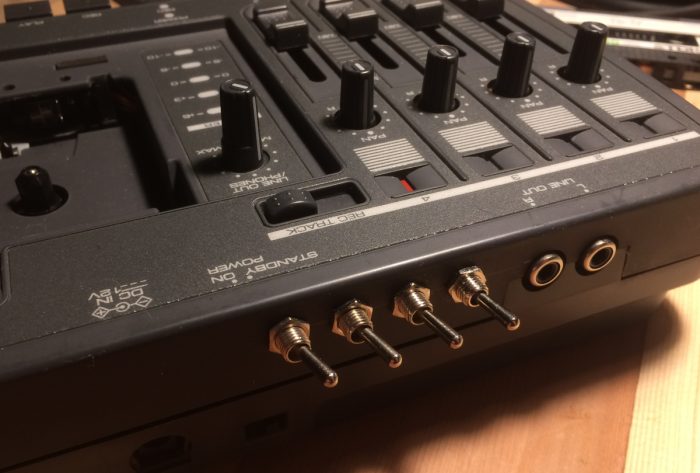
I've been making cassette tape loops recently, which necessitates disabling the erase head while recording. Constantly placing and removing a tiny sliver of tape and aluminum foil over the erase head got tedious quick. I've added 4 switches to turn on or off the erase head for each of the four tracks.
Here is an article that goes into more detail. It only posits the wiring though, and after some more research I learned that ideally there is a dummy load so the voltage that would've gone to the erase head doesn't go somewhere else, potentially messing with biases.
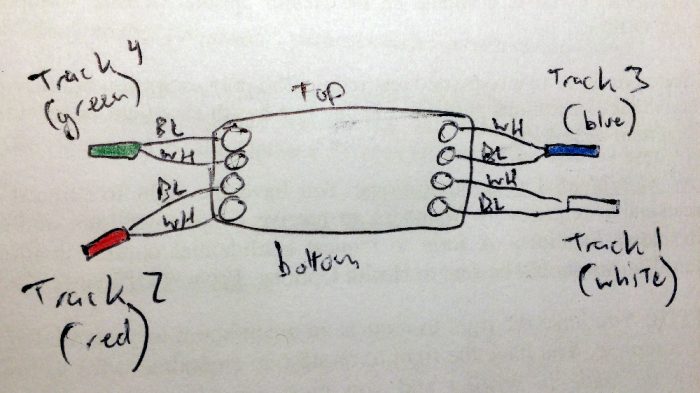
SO. Ground wires to the erase head (black on the Fostex X-12) were left in place and the SPDT switches are also wired to a separate erase head that is taped inside the case. Here's my crappy diagram of the erase head wires:
nanette trailer
Highly recommended. The trailer does it no justice, but here it is anyway:
two things i like rn
Contrapoints. Yes yes, 1000 times yes.
Also been watching a lot of Hainbach recently. Both recommended.
circuit bending an old crappy Radio Shack pedal
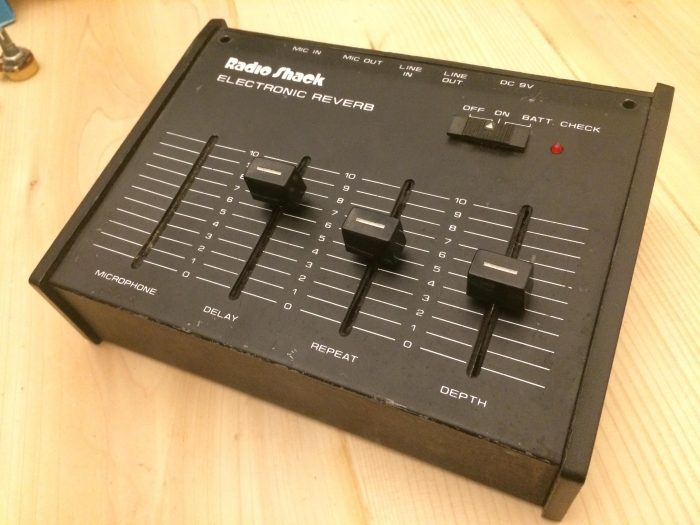
I picked this up at a yard sale thinking it was maybe an actual reverb pedal, but when I tried it at home it was just a very short delay pedal, which I already had. So it sat on my shelf for a bit before I remembered that I have the tools to alter electronics, sometimes for the better.
The first step was to desolder the sliders on the board and replace them with pots. I also sacrificed the battery bay (because 6 AAs??). Then I had plenty of room for knobs and switches.
Bending this was pretty straight forward, in that if I found a bend I'd usually incorporate it. Bends on somewhat simple hardware have a way of interacting that's impossible to discover without soldering.
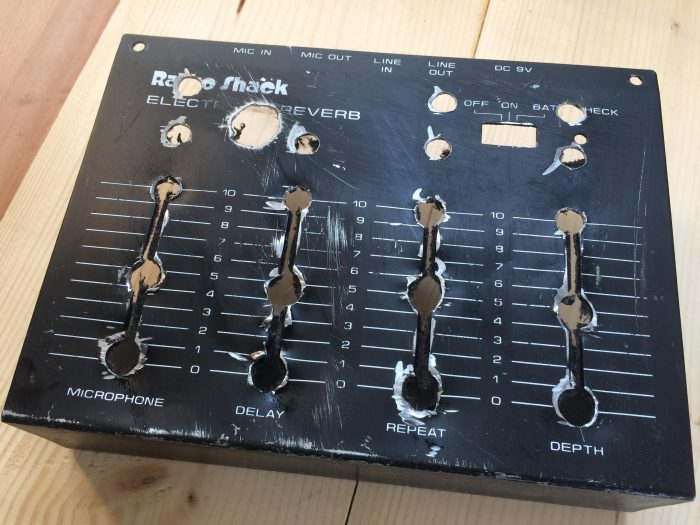
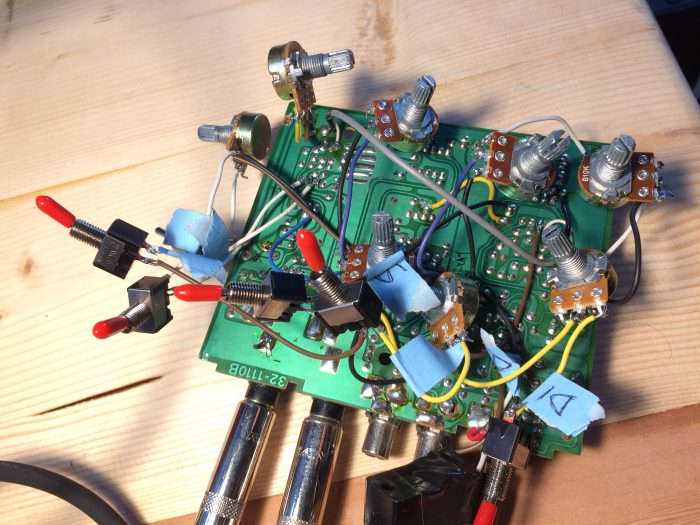
Here's the plate once I drilled (too many) holes:
And here's the board once I soldered it:
Designing the face plate on a computer and gluing the printout to the metal was a first for me. In retrospect, since there are many ways bends interact, I'd make the face plate without labels to make it a little more exploratory and experiential. I'd also use thicker paper.
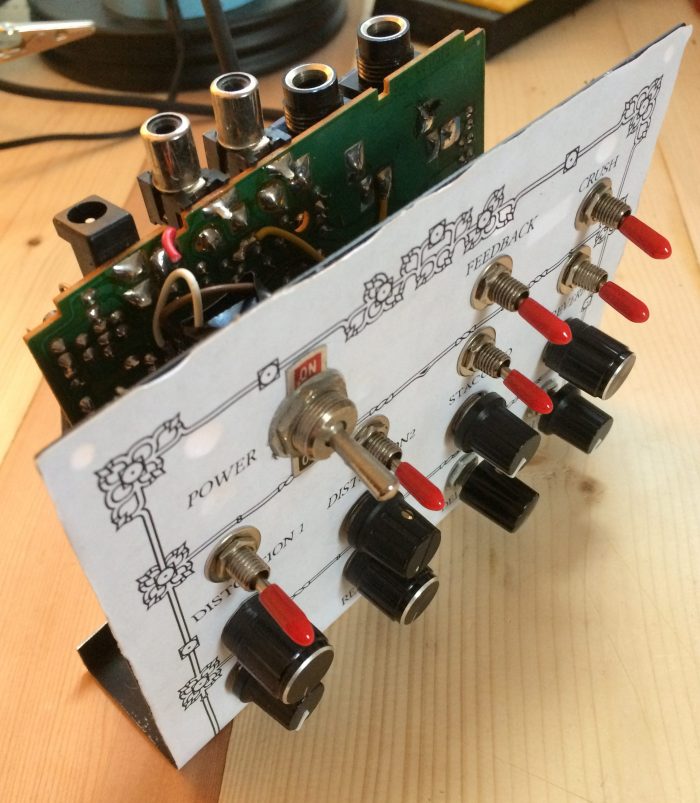
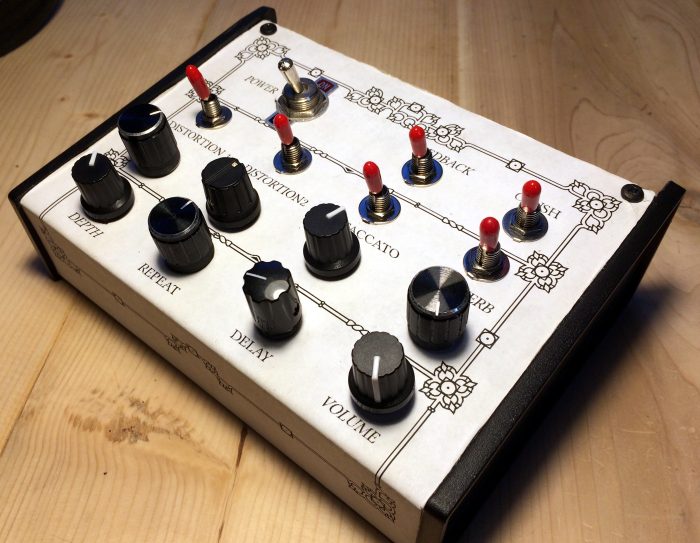
The original sliders live on as the bottom row of knobs. I found two distortions and an actual reverb (two other kinds of pedals!!) as well as a couple sometimes-useless others. Have a listen! (The initial sound is the dry signal.)
individualism article
Great little article about the ineffectiveness of fighting systems of power (in this case climate change) with consumer choices.
"Steeped in a culture telling us to think of ourselves as consumers instead of citizens, as self-reliant instead of interdependent, is it any wonder we deal with a systemic issue by turning in droves to ineffectual, individual efforts?"
What's needed is what's outlined here: WWII-scale climate mobilization.
cd40106 keyboard thing
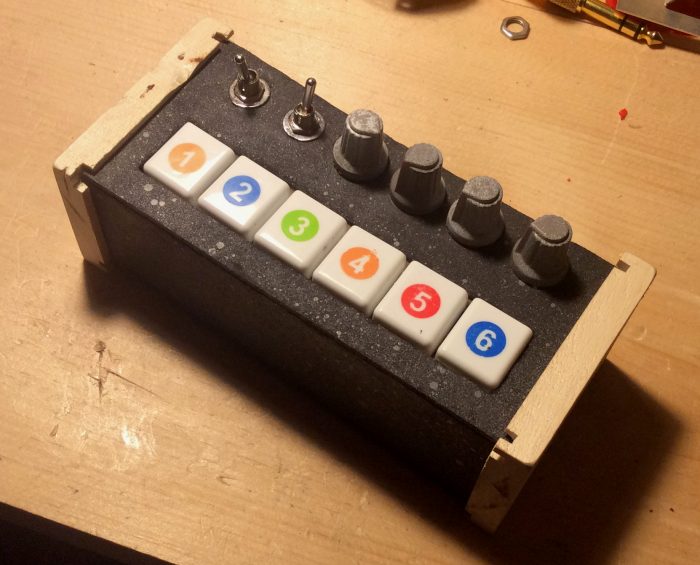
This is an instrument I built recently using the CD40106, a hex Schmitt trigger integrated circuit. It uses only two of the available six Schmitt triggers on the chip. While researching this chip (and a few others) I was a little overwhelmed by the possibilities so I decided to keep it simple (for now) and build something uncomplicated and fun but still challenging.
The case is made of 4 hardy cardboard panels fit into the outside wood blocks' grooves. There's hot glue, wood glue, and super glue in this thing. The white keys and buttons underneath were from toys. The bottom cardboard panel is attached with a single screw and has a 9V battery box (also from a toy). Here's a picture of the back and bottom.
And this is what it sounds like!
Switches and knobs from left to right: on/off, LFO triangle or square wave, LFO rate, LFO mod amount, pitch, volume.
Here's a link with a great video about this chip and some schematics. And here's my own schematic!
my home in the year
The wonderful Lauren Tosswill holding her debut album My Home in The Year:
Bandcamp link. All proceeds to Maine Inside Out
circuit bending the casio pt-100

I've had this keyboard lying around for years (I don't remember where or when I got it), and after my first bend I wanted to dive a little deeper.
After experimenting I read the writeup at tablehooters and found the chord modes, rhythm select, and sustain mode. I find the prospect of adding functionality that exists in the hardware but simply wasn't built into the keyboard really exciting. I couldn't really add more keys and the extra tone selection seemed convoluted. I also read the noystoise article which hinted at a tone select function but couldn't find it for the life of me. I did discover a fill button which I added on the far left.
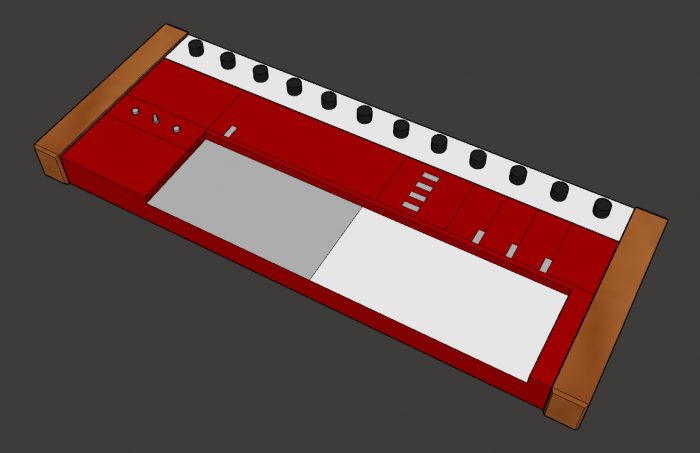
This is the final computer model I'd made after many iterations, including one with a banked panel and many more switches and knobs. There's a deceivingly trim-pot-type element close to the main IC which turned out to be a tank circuit so the pitch knob was out. I was also hoping to replace the six position volume slider with a knob but upon testing it picked up some conservative talk radio. After eliminating some similar bends and discovering the switched potentiometer trick--see below--I narrowed it down to 12 knobs on the upper panel.
In progess:
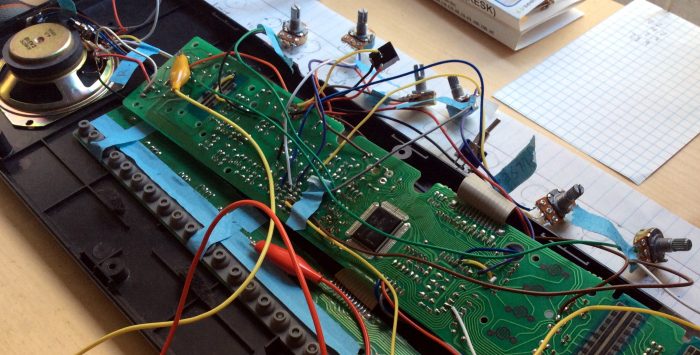
When I started this project I had very few tools and parts. So while I was waiting for the mail I was estimating the resistance range needed in a bend by the amount my 50k pot was turned. This article led me to believe I could simply limit the range of a pot by adding the appropriate resistors in parallel. That's true, but what's left out there is that doing so changes the relationship between knob turn and resistance to a more logarithmic one (see here). So using resistors to change a 50k pot to a 20k pot actually doesn't add that much control to the sound (depending) and could even make it worse.
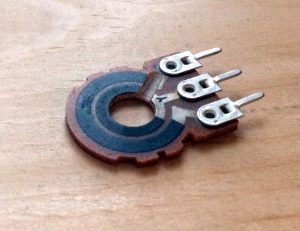
Many of the bends I found required switches but after learning you could hack a potentiometer to also act as a switch (see here and the picture) I thought it would be fun and a little nicer looking.
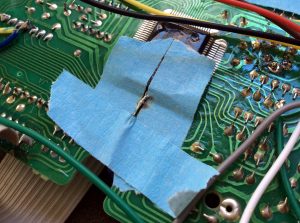
The hardest thing to solder by far was the reverb switch (called "sustain" in the tablehooters article). This involved soldering directly to an unconnected lead on the main IC, pin 90. I could always de-solder it if I messed up so the bigger challenge to me was getting that much heat near the main IC without fucking up the chip. Maybe it was unwarranted. I ended up using tape and then super gluing the insulated portion of wire directly to the PCB so it wouldn't yank loose...
Toward the end of assembly I noticed a few of the pots didn't have great connections and a couple pots didn't quite do what they had when tested. I re-soldered and fiddled hoping for the best, but really I felt like that was part of the whole putting-a-shit-ton-of-wires-and-knobs-in-old-electronics deal. Even when it's finally assembled the process of discovery continues.
Here it is before I squeezed on the back cover:
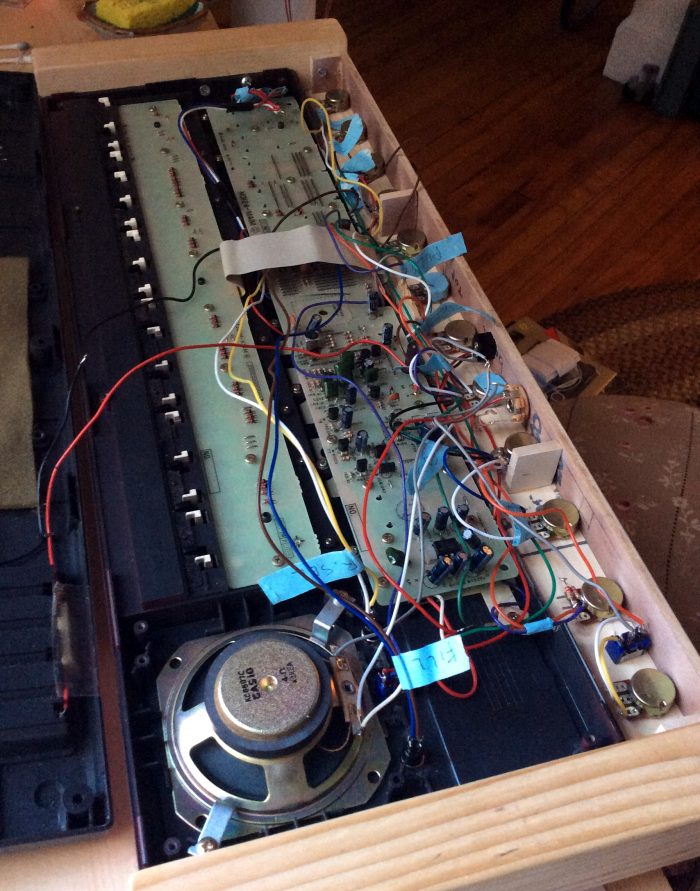
Overall I'm very happy with this project. I made a lot of tiny compromises, learned a lot, it's fun to play, and I didn't totally break anything! I consider that a success.
circuit bent casio mt-100
I opened up a gifted keyboard and found an alligator clip and a potentiometer still in the case. So I started poking around and had a lot of fun! This is my first bent keyboard. I really enjoyed making this and I'm currently working on another more ambitious project.
private and communal in zen
Here is a nice little article at No Zen in the West about the tension between the personal and communal aspects of buddhist practice and how they play into the political sphere. I've observed a dangerous inclination for some zen practitioners to be sort of new-agey and have a hands off approach to politics and this article speaks to it well.
a call to action by buddhist teachers
From this article: "The dharma is not an excuse to turn away from the suffering of the world, nor is it a sedative to get us comfortably through painful times. It is a powerful teaching that frees and strengthens us to work diligently for the liberation of beings from suffering."
